Table of Contents
ToggleA 3/4 bathroom might sound incomplete, but it’s actually one of the smartest additions a homeowner can plan, whether you’re renovating a tight guest bath, updating a secondary bedroom, or carving out a powder room with a shower. Unlike a full bathroom (which includes a toilet, sink, shower, and bathtub), a 3/4 bathroom swaps the bathtub for a shower, giving you the essentials in a footprint that works in smaller homes and tight layouts. The real challenge isn’t deciding what fixtures go where: it’s designing a small 3/4 bathroom layout or tiny 3/4 bathroom layout that feels functional and doesn’t cramp the user’s experience. This guide walks through real-world strategies for space planning, fixture placement, and design choices that’ll help you make the most of every square inch.
Key Takeaways
- A 3/4 bathroom layout eliminates the bathtub while keeping toilet, sink, and shower, saving 30–60 square feet and reducing plumbing costs compared to a full bathroom.
- Compact fixtures like elongated-bowl toilets, wall-mounted sinks, and corner units reclaim critical floor space in small and tiny 3/4 bathroom layouts.
- Strategic placement following a logical work triangle (toilet, sink, shower in sequence) minimizes awkward reaches and improves functionality in awkward dimensions.
- Light colors, vertical design elements, and proper task lighting make small bathrooms feel larger, while recessed shelving and medicine cabinets eliminate visual clutter.
- Proper waterproofing with cement board, silicone caulk, and correct shower slope prevents costly hidden mold and structural damage down the road.
What Is a 3/4 Bathroom?
A 3/4 bathroom contains three of the four fixtures found in a full bath: a toilet, sink, and shower (no bathtub). The name itself comes from real estate and appraisal conventions, it’s counted as three-quarters of a “full” bath in property valuations. This fixture combination makes sense for secondary bedrooms, master ensuites, or guest areas where a shower is the priority and bathtub use is rare.
The beauty of this setup is the space savings and cost efficiency. By eliminating the tub, you’re removing roughly 30–60 square feet from your footprint depending on the tub style, which translates to more usable floor space or a smaller overall room footprint. For homeowners working with tight budgets or limited square footage, the 3/4 bathroom layout is a practical compromise: you get showering capability without the plumbing complexity or material costs of a full bath. Most building codes recognize this fixture count, making permitting straightforward in most jurisdictions.
Essential Fixtures for Your 3/4 Bathroom Layout
Choosing the Right Toilet and Sink Configuration
When space is scarce, your fixture selection matters more than décor. Compact, elongated-bowl toilets take up roughly the same footprint as round bowls but feel less cramped (about 2 extra inches). Dual-flush models reduce water usage, most now use 0.8 gallons per flush for liquid waste and 1.6 gallons for solids, meeting WaterSense standards.
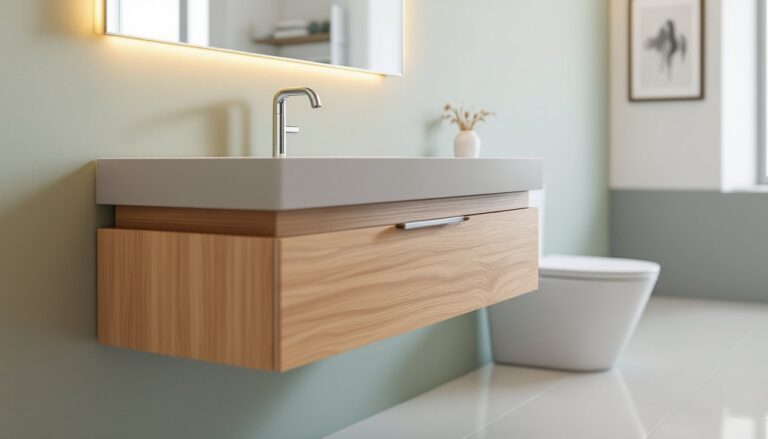
For the sink, ask yourself: Do you need storage, or do you need floor space? A 24-inch vanity with 4–6 inches of knee space underneath can hold a small amount of supplies. Wall-mounted sinks open up 18–24 inches of clear floor space, crucial in a small 3/4 bathroom layout. Consider a faucet with a single handle for ease of use and a cleaner visual footprint, less clutter above the counter.
Mixer heights and reach matter too. A faucet that extends 5–7 inches from the wall gives you sink-fill flexibility without forcing you to lean awkwardly. If you’re installing a pedestal sink or minimal vanity, ensure your water supply and drain lines are stubbed to the correct height during rough-in: moving them later means tearing into walls.
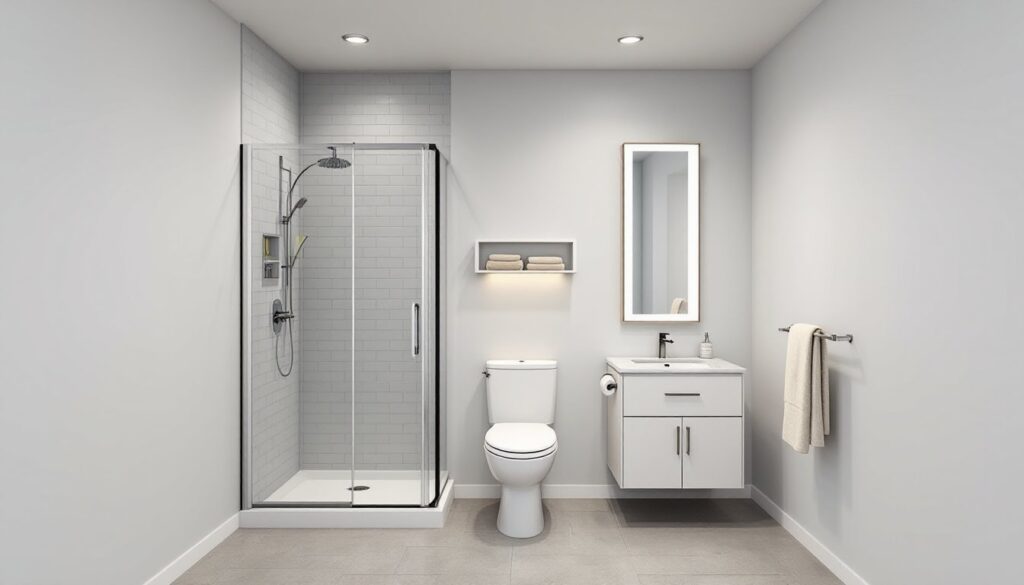
Space Planning and Flow Considerations
Working With Awkward Dimensions
Rare is the bathroom with clean right angles and symmetrical walls. If your 3/4 bathroom is wedged under a staircase, beside a sloped roof, or in a converted corner, you’ll need creative problem-solving.
Angled or sloped ceilings? Keep the toilet and sink in the taller portion of the room: the shower can tolerate lower headroom (though 6’6″ minimum is comfortable). Use corner shelving or recessed niches to store supplies without eating floor space.
Off-center doors or pocket doors? Consider the flow: toilet, sink, shower should follow a logical path without zigzagging. If your door opens directly into the shower area, reposition the shower entry or use a frosted glass panel for visual separation.
Single-wall or galley layouts? If your toilet, sink, and shower are forced into a line, prioritize spacing. Install the toilet first (fixed by the drain stack), then the sink downstream, with the shower at the far end. This “work triangle” approach, borrowed from kitchen design, minimizes awkward reaches.
For a tiny 3/4 bathroom layout, every inch matters. Consider a corner toilet (angled units save about 3 inches) or a triangular corner sink. These cost 10–20% more but reclaim usable floor space in truly constrained rooms. Test your layout with cardboard cutouts before committing to plumbing rough-in.
Design Tips for Small Bathroom Layouts
Once your fixtures are positioned, design choices amplify the sense of space (or cramped feeling). Light, natural and artificial, is your biggest ally. If your bathroom lacks a window, recessed ceiling lights spaced 2–3 feet apart prevent dark corners. Sconces flanking a mirror add task lighting and a finished look without the bulk of an overhead fixture.
Color and material selection are underrated. Light, matte finishes (soft whites, pale grays) reflect light and reduce visual clutter. Glossy or dark tiles can feel moody but shrink the perceived room size. Vertical elements, tall mirrors, open shelving, or vertical tile patterns, draw the eye upward, making ceilings feel higher.
Storage in a small 3/4 bathroom layout is always tight. Recessed medicine cabinets save 4–5 inches of wall protrusion. Open floating shelves above the toilet (if room allows) hold rolled towels or baskets. Towel bars and hooks should be positioned during framing: adding them later means anchoring into studs or using toggles that eventually loosen.
For a tiny bathroom, ventilation-integrated mirrors or heated mirrors serve dual purposes. Some modern models include LED lighting and defog features, they cost more upfront but consolidate functions and simplify the fixture count. Waterproofing is critical: use cement board (not drywall) behind tiles in wet areas, apply silicone caulk at all seams, and grade the shower floor toward the drain (a minimum 1/4-inch slope per linear foot). Poor waterproofing leads to hidden mold and structural damage worth thousands to remediate.
When browsing design inspiration, platforms like Houzz for homeowners showcase real small bathroom layouts with actual dimensions and product links. Interior design resources like Remodelista often feature bathroom remodel stories with cost breakdowns and material sources. These references ground your planning in realistic, tested solutions rather than Pinterest fantasy.
Conclusion
A well-planned 3/4 bathroom layout proves that smaller doesn’t mean less functional. By respecting code requirements, measuring twice, and prioritizing flow, you can create a shower bathroom that feels open and purposeful. Whether you’re designing a small 3/4 bathroom layout or a tiny 3/4 bathroom layout for a guest suite or secondary bedroom, the fundamentals stay the same: fixture placement, ventilation, and smart material choices make the difference. Start with a scaled floor plan, test your ideas with cardboard mockups, and invest time in waterproofing and prep, the DIY failures most homeowners regret come from rushing these foundations. With planning and attention to detail, your 3/4 bathroom will deliver years of reliable use and even boost your home’s resale appeal.