Table of Contents
ToggleA wood slat accent wall transforms a room with warmth, texture, and visual interest in a way that paint alone simply can’t achieve. Unlike wallpaper or simple paint treatments, slat walls offer a three-dimensional quality that catches light and draws the eye naturally. Whether you’re designing a contemporary living room, a cozy bedroom, or a statement-making entryway, wood slats have become a go-to solution for homeowners who want impact without extensive renovation. This guide walks you through design options, materials, tools, and the actual installation process, so you can tackle this project with confidence.
Key Takeaways
- A wood slat accent wall adds three-dimensional warmth and architectural character to any room without extensive renovation, making it a trending design solution for 2026.
- Choose slat width (2–6 inches), orientation (vertical, horizontal, or angled), and finish (white, natural, or warm wood tones) based on your style: minimalist contemporary layouts favor tight spacing and neutral finishes, while rustic designs embrace wider slats with visible grain variation.
- Proper wall prep is critical—use a 4-foot level to check for uneven surfaces, install furring strips if needed, and snap chalk lines to guide your layout and prevent alignment mistakes.
- A typical 10×12 foot wood slat accent wall installation takes one day for first-timers and requires basic tools like a miter saw, stud finder, level, and nail gun, plus safety gear.
- Maintain consistent spacing with spacer blocks, work methodically row by row, and finish with wood filler, caulk, and two coats of paint or stain for a polished, professional appearance.
- Pre-finishing slats before installation saves time and cleanup, while post-installation finishing allows easier touch-ups and is often simpler for first-time DIYers.
What Is a Wood Slat Accent Wall and Why It’s Trending
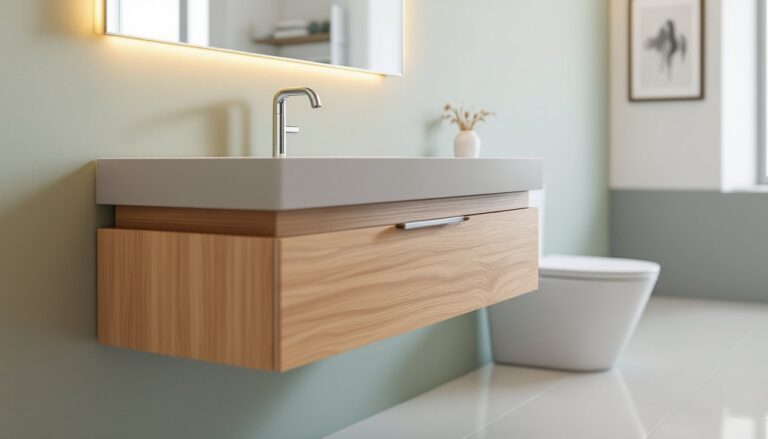
A wood slat accent wall consists of narrow, evenly-spaced strips of wood (or engineered wood) installed vertically, horizontally, or at an angle across a single wall. Slats typically range from 2 to 6 inches wide and attach to a substrate using adhesive, nails, or a combination of both. The appeal is straightforward: slat walls add architectural character without the permanence of a full renovation or the maintenance headaches of true shiplap.
Why are they trending now? Homeowners are moving away from flat, featureless walls toward designs that feel intentional and textured. Wood slats sit at the intersection of minimalist aesthetics and warm, tactile design. They’re also forgiving, you can install them yourself in a weekend or two, and if you change your mind, removal is far simpler than tearing out built-ins. The 2026 design landscape favors projects that deliver impact quickly and suit both modern and farmhouse sensibilities, making slat walls an ideal choice.
Design Styles and Wood Finishes to Match Your Decor
Your slat wall’s impact depends as much on finish and orientation as on the wood itself. The right combination elevates a room: the wrong one can feel dated or misaligned with your overall aesthetic.
Minimalist and Contemporary Approaches
For a sleek, modern look, choose slats in a consistent width (3–4 inches works well) and install them vertically or horizontally with tight, even spacing. Finish them in white, soft gray, or natural light wood stain to keep the aesthetic clean. The goal is visual rhythm, not drama. Pair minimalist slat walls with furniture that has straight lines and minimal ornamentation. Avoid staining slats in warm honey or deep walnut tones if you’re going full contemporary, those read more traditional.
Horizontal slats in a pale finish can make a room feel wider and more spacious, which works beautifully in smaller bedrooms or narrow hallways. Vertical orientation draws the eye upward, making ceilings feel higher. If you want added complexity without clutter, try a mix of widths (alternating 3-inch and 2-inch slats) in the same neutral tone.
Natural and Rustic Finishes
Rustic or farmhouse designs embrace variation. Real wood with natural grain patterns, knots, and color shifts looks intentional and inviting. Consider reclaimed-look engineered wood or authentic reclaimed lumber if your budget allows, the visible history of the material enhances the aesthetic. Stains in warm honey, weathered gray, or dark walnut create depth and anchor a room.
For a truly rustic vibe, opt for wider slats (4–6 inches) installed horizontally, which evokes cottage or cabin aesthetics. Leave small, natural gaps between slats rather than bunching them tightly. Pair this style with textured fabrics, vintage furniture, and warm lighting to complete the look. If you’re going rustic, embrace minor imperfections in installation, slight variations actually enhance authenticity.
Materials and Tools You’ll Need
Before you begin, gather everything in one place so you’re not hunting mid-project.
Materials:
- Wood slats (solid wood, engineered wood, or bamboo). Measure your wall height and width to calculate footage.
- Furring strips (1×2 or 1×3 lumber, typically pine) to create a level substrate behind slats if your wall is uneven.
- Construction adhesive (strong-hold, suitable for wood-to-drywall bonding) or finishing nails (2–2.5 inches).
- Wood filler and sandpaper if you want seamless joints.
- Primer and paint or stain, depending on your finish choice.
- Caulk (paintable) for gaps around trim or at ceiling/floor edges.
Tools:
- Circular saw or miter saw for cutting slats to length.
- Stud finder (essential for locating anchoring points behind drywall).
- Level (at least 4 feet long) to ensure vertical or horizontal alignment.
- Tape measure and pencil for layout.
- Nail gun (pneumatic or cordless) for faster installation, or a hammer if hand-driving nails.
- Drill for pilot holes if nailing by hand.
- Safety gear: eye protection, dust mask, and ear protection (saws and nail guns are loud).
Optional but helpful:
- Oscillating multi-tool for cutting notches around outlets or trim.
- Brad nailer for securing slats before applying full fasteners.
- Paint roller or brush for finishing.
Measure twice, buy 10–15% extra material in case of mistakes or damaged pieces during installation.
Step-by-Step Installation Process
Installation pace depends on wall size and your comfort level. A 10×12 foot wall typically takes a full day for a first-timer, including prep.
Preparing Your Wall and Layout
-
Clear and inspect the wall. Remove outlet plates, wall art, or trim. If the wall is painted, sand it lightly (120-grit) to help adhesive bond. Fill holes with spackling and sand smooth.
-
Check for level and plumb. Use a 4-foot level to identify high or low spots. If the wall is significantly uneven (more than 1/4 inch deviation over 4 feet), install furring strips horizontally every 16 inches to create a flat substrate. This step is critical, it prevents gaps between slats and the wall.
-
Mark your layout. Decide on slat width and orientation. For vertical slats, snap a chalk line at the top and bottom of your wall to guide the first slat. Vertical slats should be perfectly plumb (use a laser level or water level for accuracy). For horizontal slats, snap horizontal chalk lines every 3–4 inches, depending on slat width. Start at the bottom and work up to avoid surprises at the ceiling.
-
Find studs. Use a stud finder to locate studs behind drywall. Mark them with pencil. If you’re installing furring strips, nail or screw them to studs every 16 inches on center. This anchors everything and prevents flex over time.
-
Measure and cut slats. Measure wall height and width precisely. Cut slats to length using a circular saw (rough but fast) or a miter saw (cleaner cuts). Make a few test cuts on scrap first to dial in your saw angle if you’re doing angled cuts.
-
Prime and finish (optional pre-installation). You can prime and paint slats before installation (faster and cleaner) or after (easier to touch up). If pre-finishing, lay slats flat, apply two coats of primer and one coat of paint or stain, and let them dry fully.
-
Apply adhesive or fasteners. Begin at one corner, typically the bottom left for vertical slats. Apply a continuous bead of construction adhesive to the back of each slat, or drive 2.5-inch finishing nails through the slat into studs or furring strips. A nail gun speeds this up considerably but requires a learning curve.
-
Keep spacing consistent. Use a spacer block (a thin piece of wood, 1/4 inch or your chosen gap width) between slats to maintain even gaps. This is tedious but prevents the visual chaos of uneven spacing.
-
Work across the wall methodically. Don’t skip around, build row by row or slat by slat in a logical order. Check level frequently (every 4–5 slats for vertical, every row for horizontal). Mistakes compound if you don’t catch them early.
-
Handle obstacles. Around electrical outlets, light switches, or trim, you’ll need to notch slats. Measure the outlet, mark it on the back of the slat, and use a drill or oscillating multi-tool to cut the opening carefully. Instructables has detailed tutorials for handling such situations.
-
Finish gaps and edges. Once slats are secure, fill nail holes with wood filler (tinted to match your finish) and sand smooth. Caulk gaps where slats meet ceiling, floor, or trim using paintable caulk and a caulking gun. This creates a clean, professional appearance.
-
Paint or stain if finishing post-installation. Apply primer if needed, then paint or stain. Two coats of paint or stain is standard. Allow full drying time before moving heavy furniture back into the room.
The hardest part isn’t the installation itself, it’s patience during prep and layout. Rushing layout means correcting alignment mistakes throughout the job. Fix This Build That has excellent advice on wall prep for projects like this, which saves headaches down the line.