Table of Contents
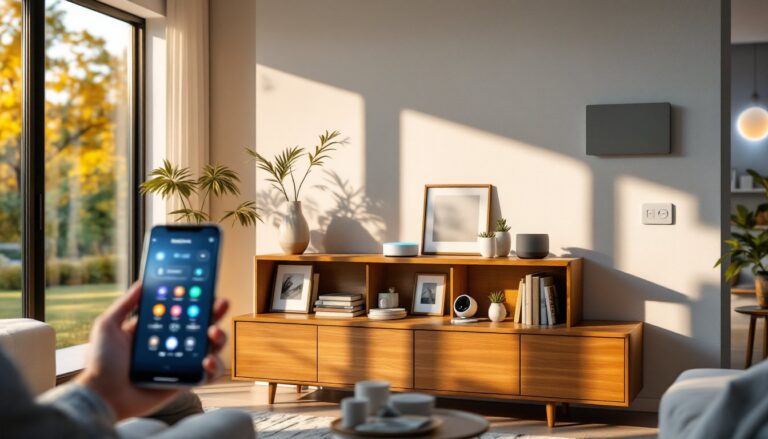
ToggleIf you’ve been thinking about making your home smarter but didn’t know where to start, a smart home controller is your entry point. It’s the central hub that lets you command everything from lights and thermostats to locks and cameras from your phone or voice commands. Whether you’re a tech-forward homeowner or just tired of flipping switches, a smart home controller simplifies daily routines and can boost your home’s security and energy efficiency. The good news? Setting one up doesn’t require an electrician or a computer science degree, just a bit of patience and the right information.
Key Takeaways
- A smart home controller serves as the central hub that connects all your smart devices, allowing you to control lights, thermostats, locks, and cameras from a single app or voice command instead of managing separate applications.
- Hub-based systems offer superior reliability and scalability with support for multiple protocols like Zigbee, Z-Wave, and Thread, making them the better choice for most homes compared to hub-free alternatives.
- Installation of a smart home controller takes less than an hour and requires only basic steps: placement in a central location, power connection, app setup, and pairing your first device—no electrician or technical expertise needed.
- Key features to prioritize when selecting a controller include compatibility with your existing devices, voice control integration, local control capability during internet outages, and an intuitive app interface for daily use.
- Start your smart home setup with just one or two devices like smart plugs or lights to get comfortable with the system before expanding to more complex devices like thermostats or security cameras.
- Proper WiFi placement and infrastructure, such as using a mesh network in homes with dead zones, ensures reliable communication between your smart home controller and connected devices.
What Is a Smart Home Controller and Why You Need One
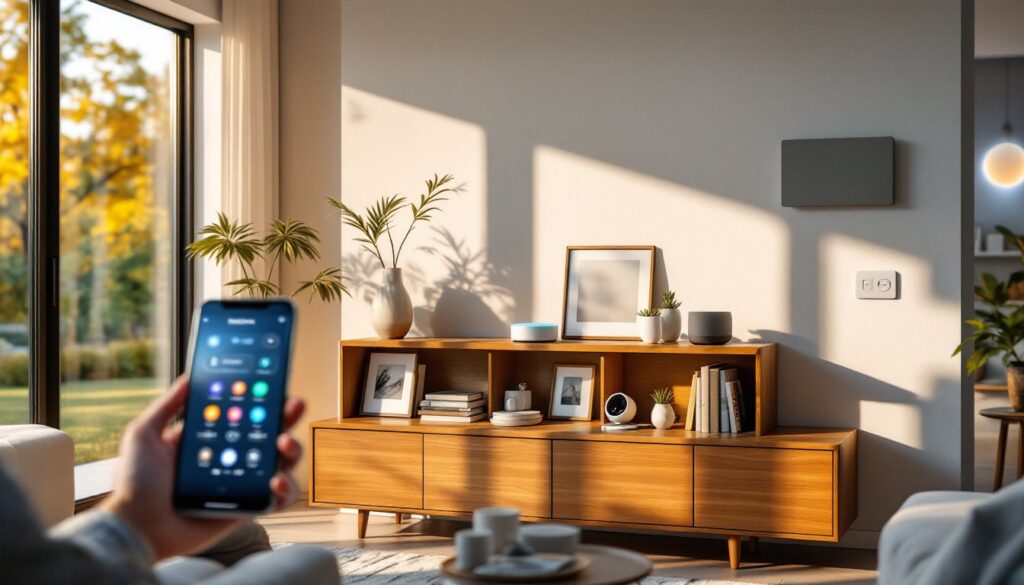
A smart home controller is essentially the brain of your automated home. It’s a device (sometimes called a hub or control station) that connects to your wifi network and communicates with all your smart devices, lights, plugs, thermostats, door locks, cameras, and more. Without a controller, many devices operate independently, requiring separate apps for each one. With one in place, you control everything from a single interface.
The real value isn’t just convenience, though that’s a nice bonus. A controller lets you create automation routines: your lights dim and your music starts when you arrive home, or your locks secure and thermostat adjusts when you leave. It also ensures your devices work together seamlessly, even if they’re from different manufacturers. According to Smart Home Tech for Beginners, getting started with a smart home system is far less intimidating than most homeowners think. You’re not rewiring your entire house, you’re just adding a layer of control on top of existing systems.
Types of Smart Home Controllers: Finding Your Best Match
The market offers two main approaches to smart home control, and understanding the difference is crucial before you buy anything.
Hub-Based vs. Hub-Free Systems
Hub-based systems require a dedicated physical device, an Amazon Echo, Google Home Hub, or Apple HomePod, sitting somewhere in your house. The hub acts as a bridge between your phone and your smart devices, communicating locally over your home network. This is more reliable than relying solely on internet signals bouncing between devices. Hubs also support more device types and protocols (Zigbee, Z-Wave, Thread), giving you flexibility to mix brands. The tradeoff? You need to buy and set up an additional piece of hardware.
Hub-free systems use your smartphone as the control center. You download an app, add devices directly to it, and manage everything there. This works fine if all your devices use the same standard (WiFi-based devices are most common). It’s cheaper upfront and requires no extra hardware. But, you’re limited to devices that talk to each other over WiFi, which can be less reliable than a dedicated hub, especially if your router is far from certain devices.
The best smart home tech for most homes leans toward hub-based setups because they’re more scalable and reliable. Experts at Digital Trends regularly test and rank hubs, and the consensus is that a dedicated hub future-proofs your system as you add more devices.
Key Features to Look For When Choosing a Controller
Not all controllers are created equal. Before settling on one, consider these must-haves.
Compatibility and Protocol Support: Confirm the controller supports the devices you own or plan to buy. If you already have a mix of Philips Hue lights and a Nest thermostat, pick a hub that plays nicely with both. Many modern hubs support Zigbee, Z-Wave, and Thread, broader protocol support means fewer compatibility headaches later.
Voice Control: Most modern controllers integrate with Alexa, Google Assistant, or Siri. Voice control isn’t essential, but it’s incredibly useful for daily tasks (“Alexa, set the bedroom to 68 degrees”). Test the voice recognition in your home environment if possible: some systems perform better in noisy kitchens than others.
Local Control: This is a game-changer for reliability. Some hubs let you control devices even if your internet goes down, they communicate locally over your home network. This feature is worth its weight in gold during outages.
Backup and Redundancy: Look for hubs that offer cellular backup or support multiple network paths. A system that fails completely when your wifi drops is frustrating.
App Interface: You’ll use the controller’s app daily. Download it before buying and test the free trial if available. Is it intuitive? Does it load quickly? Can you create automation rules easily?
Expandability: Choose a hub that supports future additions. Smart Home Tech Strategies emphasize that most homeowners expand their systems over time, starting with a few devices and growing from there. A restrictive hub becomes a bottleneck.
Installation and Setup Basics for DIY Homeowners
The good news: installing a smart home controller is not complicated. Most setups take under an hour.
Step 1: Choose Your Controller Location
Place your hub in a central location in your home, ideally within line-of-sight (or at least on the same floor) as your wifi router. A bookshelf in your living room or a hall cabinet works fine. Avoid closets or rooms with thick walls that block radio signals: hubs communicate via WiFi and sometimes via Zigbee/Z-Wave, which have limited range through obstacles.
Step 2: Power and Network Connection
Plug the hub into a standard outlet. Most controllers use an Ethernet port or connect via WiFi. If you have an Ethernet connection available nearby, use it, it’s more stable than WiFi alone. Download the manufacturer’s app (Amazon Alexa, Google Home, etc.) to your phone.
Step 3: Run the Setup Wizard
Open the app and follow the on-screen prompts. You’ll connect the hub to your home WiFi, create or sign into an account, and name your home and rooms. This step usually takes 5–10 minutes.
Step 4: Add Your First Device
Start with one device to test the system. A smart plug is a good choice, they’re cheap (usually $15–30), don’t require installation, and let you practice pairing a device to the hub. Open the app, tap “Add Device,” hold the plug near the hub (within a few feet), and follow the prompts. The hub will detect it and walk you through naming and setup.
Step 5: Create Your First Automation
Once you have a device connected, create a simple routine: “When I say ‘Goodnight,’ turn off the living room light.” Testing an automation now ensures you understand how the system works before you add more devices.
If your home has dead zones (rooms far from the router with weak WiFi), you may need a WiFi extender or mesh network to ensure reliable communication. This isn’t a smart home issue, it’s a WiFi infrastructure issue. Address it before blaming the controller.
Common Smart Home Devices You Can Control
Once your controller is running, here are the most popular devices homeowners add first.
Smart Lights: Bulbs or fixtures that dim, change color, or turn on/off remotely. Philips Hue and LIFX are popular choices. Install these like regular bulbs, no wiring changes needed.
Smart Thermostats: Devices like Nest or Ecobee let you adjust temperature remotely and set schedules. These usually replace your existing thermostat, which involves a bit more work (turning off power at the breaker, identifying wire terminals, and reconnecting them). Most homeowners can do this, but if you’re unsure, call an HVAC tech, thermostats are too important to guess on.
Smart Plugs: Among the easiest to install. Plug them into existing outlets, add them to your controller, and you can control anything plugged into them (fans, lamps, space heaters). Useful for managing devices that aren’t smart-enabled.
Smart Locks: Keypad or app-controlled door locks. Installation varies by lock type: some retrofit your existing deadbolt in minutes, others require replacing the whole lock assembly. Read the manual carefully before buying, some require a locksmith if you’re uncomfortable drilling or removing hardware.
Security Cameras: Wired or battery-operated indoor/outdoor cameras that integrate with your controller. Wired cameras require running power cables (often to your garage or basement): battery models are easier to install but need regular charging. Tom’s Guide reviews controllers and compatible camera systems extensively.
Smart Speakers: Echos, Minis, or Home devices add voice control and music streaming to any room. These are just plug-and-play devices with no installation complexity.
Start small. Pick one or two devices and get comfortable with the system before loading your entire house with smart gear. Most DIY failures come from folks who buy everything at once and then get overwhelmed during setup.
Conclusion
A smart home controller is the foundation for a truly connected home. Whether you choose a hub-based or hub-free system depends on your needs, budget, and existing devices. The installation process is straightforward, and starting small ensures you’ll actually use what you set up. Take your time, read the manuals, and don’t hesitate to reach out to manufacturer support if something isn’t working. Most issues resolve with a simple restart or reconnection. Your automated home is closer than you think.