Table of Contents
ToggleInstalling an Arlo doorbell transforms your home’s security and convenience, giving you real-time notifications and video footage from your front door. Whether you’re a DIY veteran or tackling smart home installation for the first time, the process is straightforward when you know what to expect. This guide walks you through every step, from gathering tools to configuring your app, so you can have your Arlo doorbell up and running in under an hour. Understanding how to install Arlo doorbell hardware correctly ensures reliable performance and peace of mind for years to come.
Key Takeaways
- Arlo doorbell installation can be completed in under an hour by gathering the right tools, materials, and checking your Wi-Fi signal beforehand to ensure strong connectivity within 30 feet of your router.
- Proper doorframe preparation—including cleaning surfaces, testing Wi-Fi range, and positioning the mounting bracket at eye level (48-54 inches)—prevents most installation headaches and ensures reliable performance.
- The installation process involves mounting the hardware, inserting batteries in the correct orientation, sliding the doorbell onto the bracket until it clicks, and sealing gaps with weatherproof caulk to protect wiring from weather damage.
- Configuring your Arlo doorbell through the app by testing the camera feed, enabling notifications, setting recording preferences, and adjusting motion sensitivity optimizes security performance while balancing battery life.
- Common issues like weak video, Wi-Fi disconnections, and rapid battery drain can be resolved by repositioning your router, reducing motion sensitivity, updating firmware, and using high-quality alkaline batteries rather than low-cost alternatives.
What You’ll Need Before Installation Begins
Before you drill into your doorframe, gather your materials and tools. You’ll avoid frustrating mid-project trips to the hardware store and ensure the job goes smoothly.
Materials:
- Your Arlo Video Doorbell unit (battery or wired model)
- Arlo mounting bracket and hardware (usually included)
- 2 x AA or 2 x AAA batteries (depending on your model)
- Weatherproof sealant or caulk
- Double-sided tape (if using adhesive mounting: optional)
Tools:
- Drill with bits (for pilot holes into wood)
- Screwdriver set (Phillips and flathead)
- Level (to ensure vertical alignment)
- Tape measure
- Pencil for marking
- Stud finder (optional but helpful for identifying solid substrate)
- Hex key or Allen wrench (if your bracket requires it)
Safety gear:
- Safety glasses to protect your eyes from dust and debris
- Work gloves for handling materials
- Dust mask if drilling into older materials (asbestos risk in homes built pre-1980s)
Make sure your home’s Wi-Fi signal reaches your doorway, test this with your phone first. A weak signal will cause connectivity issues after installation.
Preparing Your Doorway for the Arlo Doorbell
Proper prep work prevents most installation headaches. Start by inspecting your existing doorbell or the mounting surface where your Arlo unit will go.
Remove the old doorbell (if applicable). Turn off power at your breaker if it’s hardwired, then unscrew and disconnect the old unit. Use a voltage tester to confirm power is truly off before touching wiring.
Clean and inspect the surface. Use a cloth to remove dirt, dust, and paint buildup from where the mounting bracket will attach. If the existing hole doesn’t align with your Arlo bracket, you’ll need to patch it with wood filler or spackle, sand it smooth, and potentially drill new pilot holes. Most doorframes are made of wood or aluminum: use the appropriate pilot bit size for your fasteners.
Check door frame condition. Look for rot, damage, or loose trim. A weakened frame won’t hold your Arlo securely. If the trim moves when you apply pressure, reinforce it or select an alternative mounting location.
Test your Wi-Fi range. Your doorbell should sit within 30 feet of your router for reliable connectivity. If your router is farther away, consider a Wi-Fi extender or mesh system: reviews of smart home technology cover mesh networking solutions that strengthen doorbell reliability.
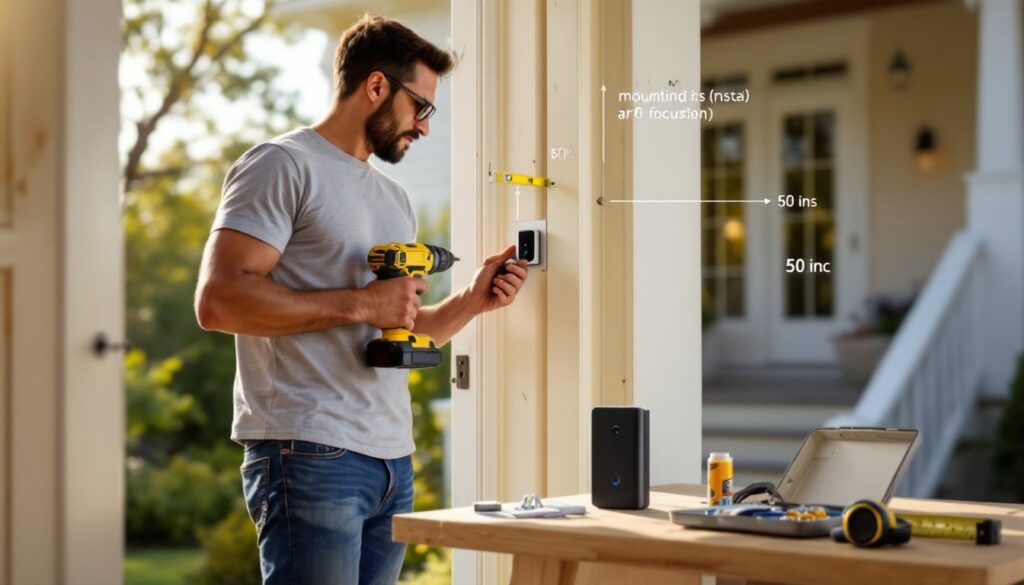
Position the mounting bracket. Use your level and tape measure to mark the bracket location at eye level (typically 48-54 inches from the ground), centered on the door frame. Make sure the camera lens faces forward without obstructions like porch lights or plants blocking the view.
Step-by-Step Installation Process
Mounting the Doorbell Hardware
-
Drill pilot holes. Using your marked positions, drill holes slightly smaller than your fasteners, this prevents the wood from splitting. If mounting on metal trim, use a metal bit and go slower to avoid slipping.
-
Attach the mounting bracket. Align the bracket with your pilot holes and drive the corrosion-resistant screws (usually stainless steel) firmly. Use your level again to confirm the bracket is plumb and level. A crooked bracket throws off the camera angle and looks unprofessional.
-
Insert batteries into the Arlo unit. Before mounting, pop open the back or side panel of your doorbell and insert fresh batteries in the correct orientation (positive and negative terminals marked inside). Many installation issues stem from dead or improperly seated batteries, so don’t skip this.
-
Slide the doorbell onto the bracket. Most Arlo models use a hook-and-slide system. Align the top of the unit with the bracket’s top slot, then push downward until it clicks into place. You should hear or feel a distinct snap.
-
Secure the faceplate. Depending on your model, the faceplate or trim ring screws on or clips over the unit. Tighten screws gently, over-tightening can strip plastic threads.
Connecting to Power and WiFi
-
Confirm battery power or wire hardwired models. Battery-powered Arlo doorbells start working once batteries are installed. If you have a wired model, you’ll need to connect the existing doorbell wires (typically low-voltage red and black wires) to the terminals on your Arlo’s internal connector. Turn power back on at your breaker after connecting.
-
Seal gaps with weatherproof caulk. Apply silicone caulk around the edges where the bracket and doorbell meet the door frame. This prevents rain and insects from entering and protects your wiring. Let it cure per product instructions (usually 24 hours) before exposing to weather.
-
Download and open the Arlo app. On your smartphone, download the Arlo app (iOS or Android). Create an account if you don’t have one, then log in.
-
Add your device. In the app, select “Add Device” and follow the on-screen prompts. The app will search for your doorbell’s Wi-Fi signal. Make sure your phone is connected to the same 2.4 GHz network your doorbell will use (Arlo doorbells typically don’t support 5 GHz).
-
Enter your Wi-Fi password. When prompted, enter your network’s password. The doorbell will connect and download the latest firmware, this takes 2-5 minutes. Wait until the app confirms a successful connection before moving on.
Configuring Your Arlo App and Settings
Once your Arlo doorbell is connected, a few quick app tweaks optimize its performance and fit your security needs.
Test the camera feed. Open your doorbell’s live view in the app. You should see a clear, real-time video without lag. Pan the camera (if your model supports it) and confirm the image quality meets your expectations. If video is pixelated or jerky, move your router closer or check for Wi-Fi interference from microwaves and cordless phones.
Enable notifications. Go to Settings → Notifications and toggle on alerts for doorbell presses and motion detection. You can customize notification frequency so you’re not bombarded, for example, set motion alerts to ignore small animals or passing cars if they’re false alarms.
Set recording preferences. Choose whether to record on motion, doorbell press, or both. Battery-powered models benefit from limiting continuous recording to save battery life. Cloud storage (free tier) typically stores 7 days of events: paid plans offer longer retention.
Adjust motion sensitivity. Most Arlo apps let you set how sensitive the doorbell is to movement. If you get alerts every time a leaf blows across the porch, lower the sensitivity. Higher sensitivity catches smaller motion but drains batteries faster.
Create activity zones (optional). Some Arlo models let you define specific areas the camera monitors. You might exclude a tree that sways in wind or focus on your front steps where actual visitors appear. The technical specifications for Arlo Video Doorbell 2K outline these customization options in detail.
Test audio and two-way talk. Ring the doorbell manually (some apps have a test feature) and confirm you hear the chime inside. Use the two-way audio feature to speak through the app, make sure the visitor hears you clearly. Background noise filters help in noisy areas.
Update firmware if needed. The app will notify you of firmware updates. Install them when prompted: they fix bugs and add features.
Troubleshooting Common Installation Issues
Not every installation goes perfectly on the first try. Here’s how to solve the most frequent hiccups.
Doorbell won’t connect to Wi-Fi. Ensure your phone and the doorbell are within range of your router. Restart your router by unplugging it for 30 seconds. If the doorbell still won’t connect, reboot it by removing and reinserting batteries (or flipping the breaker for wired models). Check that you’re connecting to a 2.4 GHz network, not 5 GHz, Arlo doorbells require the older standard.
Weak or choppy video. Move your router closer to your front door or install a Wi-Fi extender. Interference from metal objects, thick walls, or neighboring networks can degrade signal. If video remains poor, your home may need a mesh Wi-Fi system to distribute strong coverage throughout.
Doorbell keeps disconnecting. Intermittent dropouts usually mean your Wi-Fi signal fluctuates. Check your router’s position and reduce obstacles between it and the doorbell. Update the doorbell’s firmware and reset the device if disconnects persist.
Batteries drain too quickly. Excessive motion detection or high-definition recording at night consumes battery power. Reduce motion sensitivity, disable night vision if you don’t need it, or switch to event-only recording. Some users report better battery life with premium alkaline batteries over dollar-store brands.
Doorbell doesn’t recognize button presses. Make sure the push button makes firm contact. If it feels spongy or doesn’t click, the mechanical switch may be failing, contact Arlo support for a replacement. Alternatively, some Arlo models let you create automations triggered by time-based rules rather than button presses.
Wired model won’t power on. For hardwired installations, confirm power reaches the doorway. Use a multimeter to test voltage at the transformer (usually 16-24 VAC). If no voltage, the transformer has failed and you’ll need a replacement. If voltage is present but the doorbell doesn’t power on, the internal connection may be loose, reseat the wires firmly in the terminal block.
Motion or audio detected, but video is missing. This usually means the camera itself is malfunctioning. Try a factory reset: hold the reset button for 15 seconds (location varies by model, check your manual). If the camera still doesn’t record video, the unit may be defective and should be returned under warranty.