Table of Contents
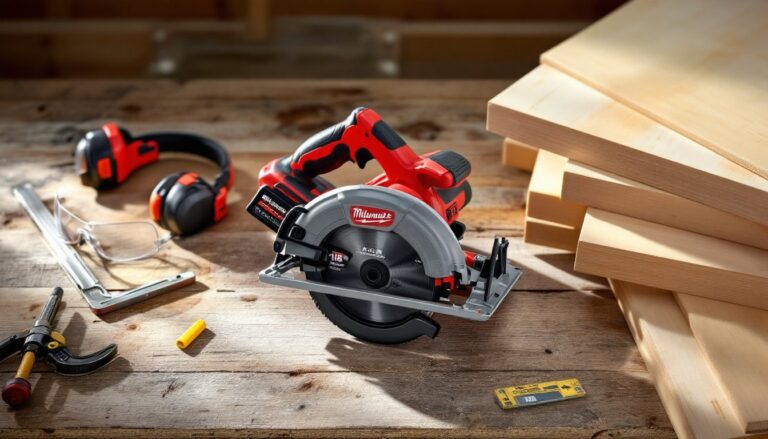
ToggleA miter saw is the workhorse of the workshop, it makes crosscuts, angles, and compound bevels with speed and precision that a circular saw or table saw can’t match. If you’re tackling crown molding, picture frames, deck railings, or trim work, a miter saw becomes indispensable. Milwaukee miter saws have built a strong reputation among DIY homeowners and professionals alike for their durability, motor power, and consistent accuracy. Whether you’re hanging baseboards in a living room refresh or building custom shelving, understanding what to look for in a Milwaukee model, and how to set it up safely, will make the difference between clean joinery and frustration. This guide walks you through the features, models, and best practices you need to make confident cuts.
Key Takeaways
- Milwaukee miter saws deliver consistent accuracy and clean cuts thanks to brushless motors that maintain speed under load, making them ideal for trim, crown molding, and furniture joinery work.
- A 10-inch corded Milwaukee miter saw strikes the best balance for most DIY projects, offering sufficient cutting capacity for baseboards and crown molding at a reasonable price point ($300–$500).
- Proper setup, calibration, and safety practices—including checking blade alignment, wearing eye and hearing protection, and maintaining a clean blade—are essential before making your first cut.
- Milwaukee miter saws stand out for durability thanks to cast aluminum bases and steel components that resist warping, plus a strong aftermarket ecosystem for blades and replacement parts.
- Choose between corded models for unlimited runtime on large projects or cordless M18 FUEL options for portability and job-site convenience, depending on your workshop setup and project demands.
Why Milwaukee Miter Saws Stand Out for DIY Enthusiasts
Milwaukee has earned respect in the tool market because they prioritize motor performance and accuracy without excessive price inflation. Their miter saws deliver consistent bevel angles and crosscut repeatability, things that matter when you’re aligning trim or creating furniture joinery.
One reason DIYers gravitate toward Milwaukee is the balance between power and control. A underpowered motor will bog down in hardwoods (oak, maple) or thick stock, leaving burn marks and requiring multiple passes. Milwaukee’s brushless motors are engineered to maintain speed under load, which means cleaner cuts and faster work. You’re not fighting the saw: the saw works with you.
Durability is another factor. Milwaukee saws often feature cast aluminum bases and steel components that resist warping and don’t need constant recalibration. Cheaper saws (under $150) can develop play in the fence or head after a season of hard use. Milwaukee models hold their geometry longer, which saves frustration and time.
They also have a solid aftermarket ecosystem. Blades, fences, laser guides, and replacement parts are widely available and reasonably priced. If you need a resource on miter saw performance and options, independent testing confirms Milwaukee’s track record for reliability across their range.
Key Features and Specifications to Look For
When evaluating a Milwaukee miter saw, several specs directly affect cut quality and how well the saw suits your projects.
Blade Size and Cutting Capacity
Milwaukee offers 8-inch, 10-inch, and 12-inch blade sizes. Blade diameter determines the maximum depth and width you can cut in a single pass. An 8-inch saw handles material up to roughly 4 inches deep and 10 inches wide (nominal 1×10 lumber fits). They’re lighter, cheaper, and portable, ideal for trim work and small projects.
A 10-inch saw cuts about 5.5 inches deep and 12 inches wide, covering most framing lumber and crown molding applications. This is the sweet spot for most home DIYers: enough capacity for common tasks without the bulk or cost of a 12-inch.
A 12-inch saw accommodates thicker stock and wider boards but weighs more and costs more. You’ll want one if you’re building larger furniture, thick deck railings, or structural trim. For typical interior renovation work, a 10-inch handles 90% of jobs.
Also check the miter range (usually 0° to 52° left and right) and bevel capacity (typically 0° to 45° or 0° to 48°). Most projects stay within these limits, but confirm the specs match your planned cuts.
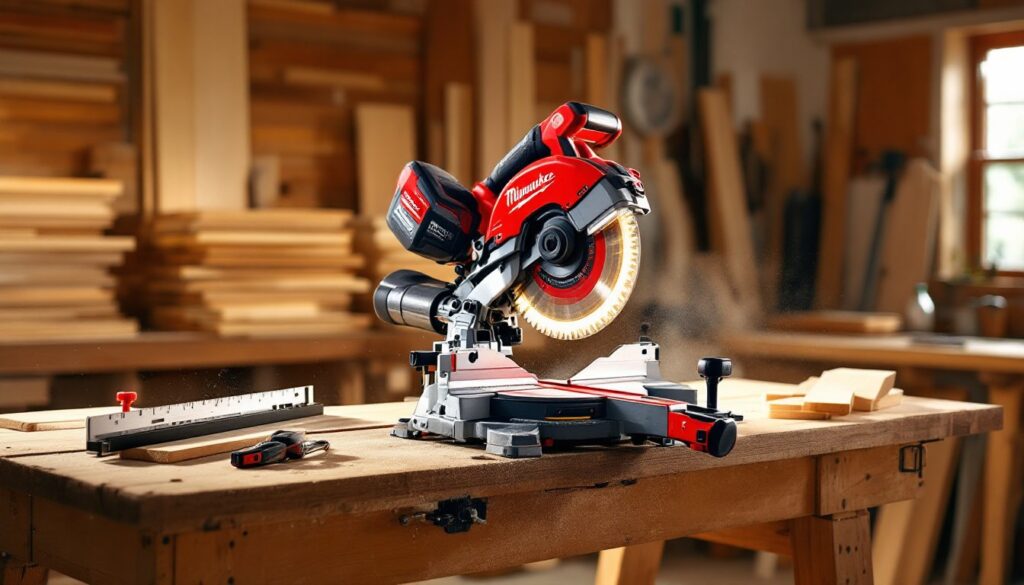
Power and Motor Performance
Brushless motors are now standard on Milwaukee’s mid-to-premium miter saws. A brushless motor runs cooler, lasts longer, and maintains cutting speed better than a brushed motor when working through hardwoods or thick softwoods. Look for motor specs listed in amps (typically 15 amps for corded models) or, for cordless versions, the voltage and amp-hour rating of the battery.
Corded saws offer unlimited runtime and consistent power, important if you’re making 50+ cuts in a single day. Cordless (18V or 20V Milwaukee M18 FUEL models) trade total run time for portability and convenience on job sites without nearby outlets. Battery life typically handles 20–40 crosscuts in 2×4 lumber before needing a swap.
RPM (revolutions per minute) affects cut speed and surface finish. Most miter saws run 3,000–4,000 RPM at no-load. A faster blade speed generally yields cleaner cuts, especially in harder woods. Milwaukee’s brushless models maintain RPM under load better than budget alternatives.
Choosing the Right Model for Your Projects
Start by honestly assessing what you’ll cut. Interior trim work and furniture building rarely demand a 12-inch saw: a 10-inch corded Milwaukee miter saw (typically in the $300–$500 range) handles baseboards, crown molding, shelving, and picture frames with ease.
If portability matters, you’re moving between job sites, a condo with limited space, or working outdoors, consider a cordless M18 FUEL model. They’re lighter, quieter, and don’t require a power cord, but battery swaps and recharge time add friction on large projects. For a dedicated workshop or basement, corded makes more sense.
Budget also plays a role. Milwaukee’s entry-level 10-inch saws start around $250–$300 and serve well for occasional DIY work. Mid-range models ($400–$600) add laser guides, improved fence systems, and more robust motors. Premium compound miter saws (10-inch or 12-inch, $700+) offer dual sliding heads for wider crosscuts or heavy-duty cordless options with bigger batteries.
For a first miter saw, a Milwaukee 10-inch corded model strikes the best balance: reasonable cost, proven reliability, sufficient capacity for residential projects, and low maintenance. If you plan to use it heavily, invest in a second battery and charger for cordless, or stick with corded to avoid battery management. Research woodworking project tutorials and tool reviews to see how experienced builders set up their shops and which saw configurations they rely on most.
Essential Setup, Safety, and Maintenance Tips
Before making your first cut, spend 10 minutes checking alignment and calibration, this pays dividends in accuracy. Place the saw on a solid, level bench or table: an unstable base introduces vibration and angular errors. Use a speed square or digital angle gauge to verify that the blade is exactly 90° to the base when set at 0° miter. Also check that the bevel is dead-vertical (0° bevel angle) when the head is upright.
Always wear ANSI-rated safety glasses when cutting: wood splinters can ricochet at eye level. Use hearing protection (earplugs or earmuffs) to limit exposure to sustained 90+ dB noise. For dusty work, a dust mask or respirator prevents inhalation of fine hardwood particles. Avoid loose clothing or jewelry near the blade: a miter saw blade spins at 3,000+ RPM and will snag fabric instantly.
Keep the blade clean. Resin and pitch buildup dulls the blade faster and leaves burn marks on wood. A carbide blade cleaner or soak in mineral spirits removes buildup quickly. Replace dull or damaged blades immediately: a dull blade forces the motor to work harder, causes tear-out, and burns wood.
Lubricate the blade arbor and fence pivot points every 6–8 hours of use (or quarterly for light use) with a light machine oil or PTFE-based lubricant. Wipe away excess to prevent dust accumulation. Check the fence for squareness to the blade at least once per season: a fence that’s even 1° out of square will throw your miter cuts off by the time they reach longer pieces.
Store the saw in a dry location. Dust accumulation inside the motor housing restricts air cooling, so periodically blow out vents and the motor with compressed air. Renovation guides and classic tool maintenance techniques document best practices for keeping workshop tools in top condition over years of use.
Conclusion
A Milwaukee miter saw is an investment that rewards preparation, safe habits, and realistic expectations about what it can do. Choose the right blade size and motor type for your projects, spend time setting it up accurately, and maintain it consistently. You’ll produce clean, professional cuts for trim, furniture, and framing tasks that define the difference between a rushed project and one you’re proud to show off.